TUTORIALS
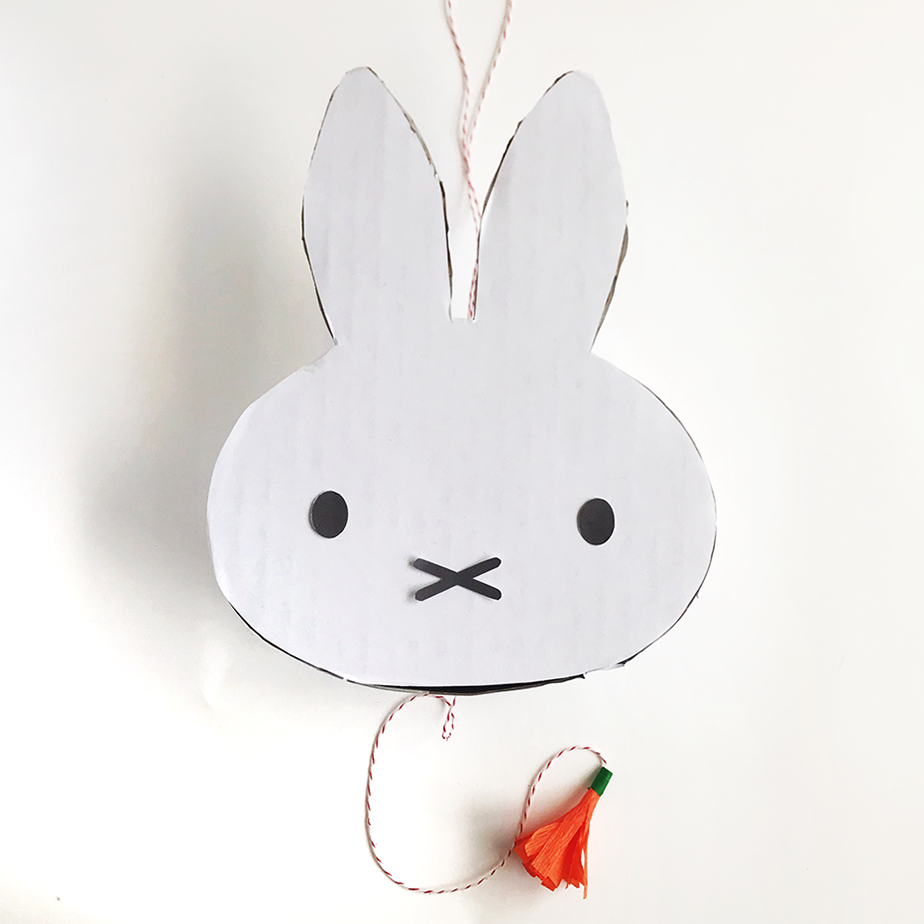
MINI BUNNY PIñATA
Welcome to my first tutorial.
We are going to be making a cute Mini Bunny piñata to celebrate Easter!
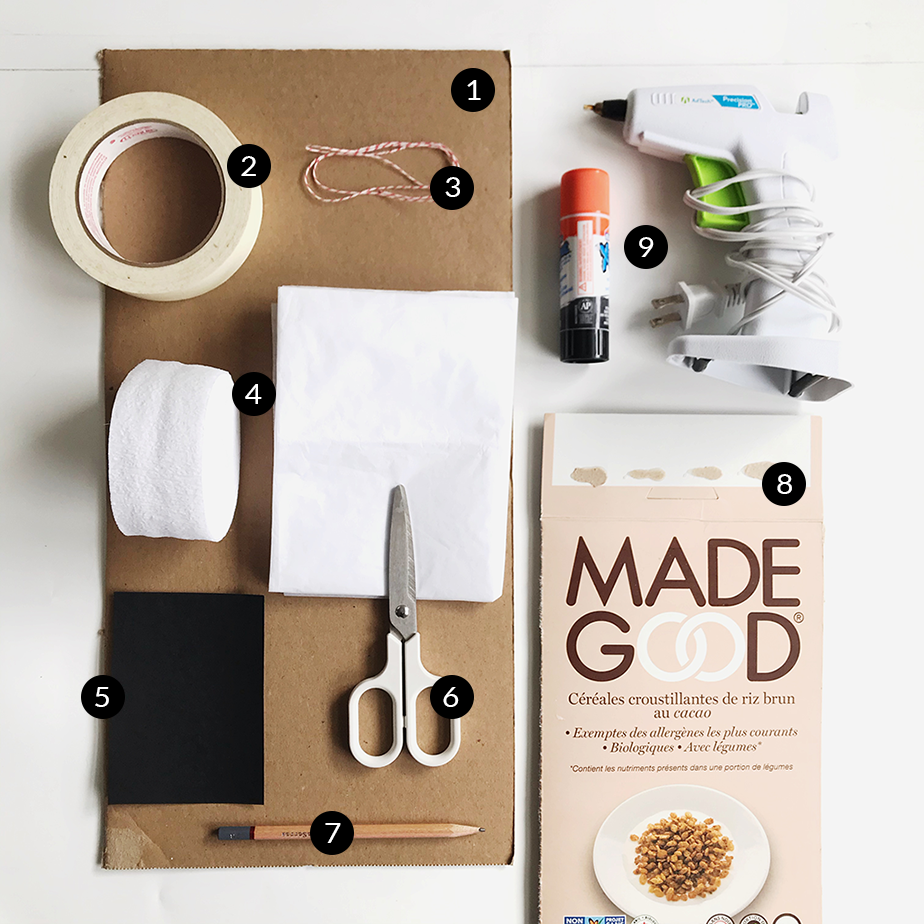
You’ll need the following materials:
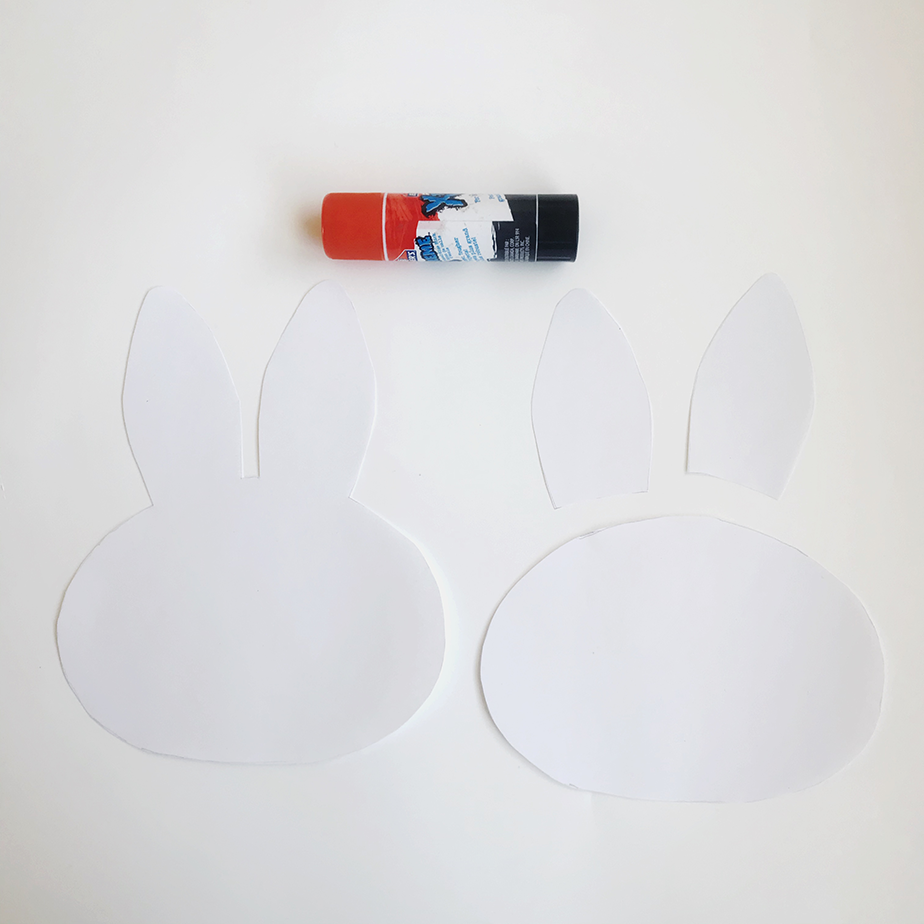
1. A piece of cardboard, 8.5 x 11 will be enough for one piñata.
2. Masking tape.
3. String or ribbon.
4. Paper to decorate, you can use crepe paper (like those streamers you can buy at dollar stores), tissue paper, or even regular copy paper. I’m using white paper for my bunny but yours can be any colour you want.
5. A piece of black paper, this is for the eyes and mouth, but you can also just cut the eyes you will be printing on the template.
6. Scissors (strong enough to cut through cardboard, you can use a utility knife if you are an adult).
7. Pencil.
8. Cereal box.
9. Glue, it can be a glue stick or hot glue gun.
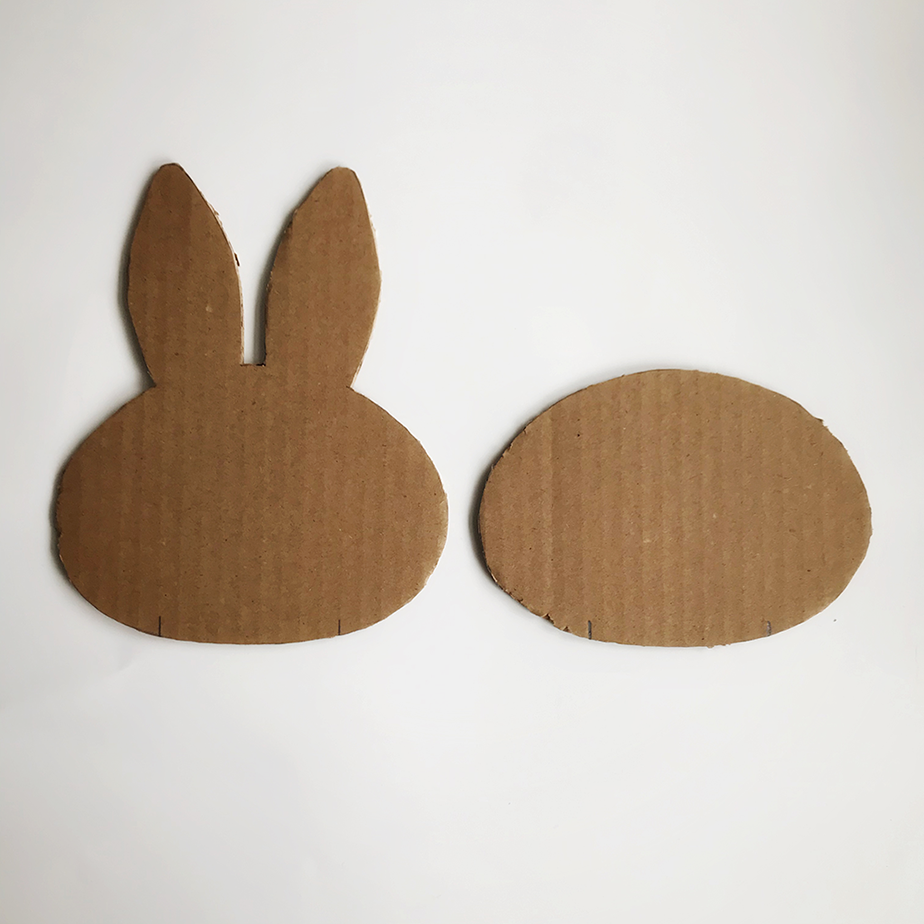
1
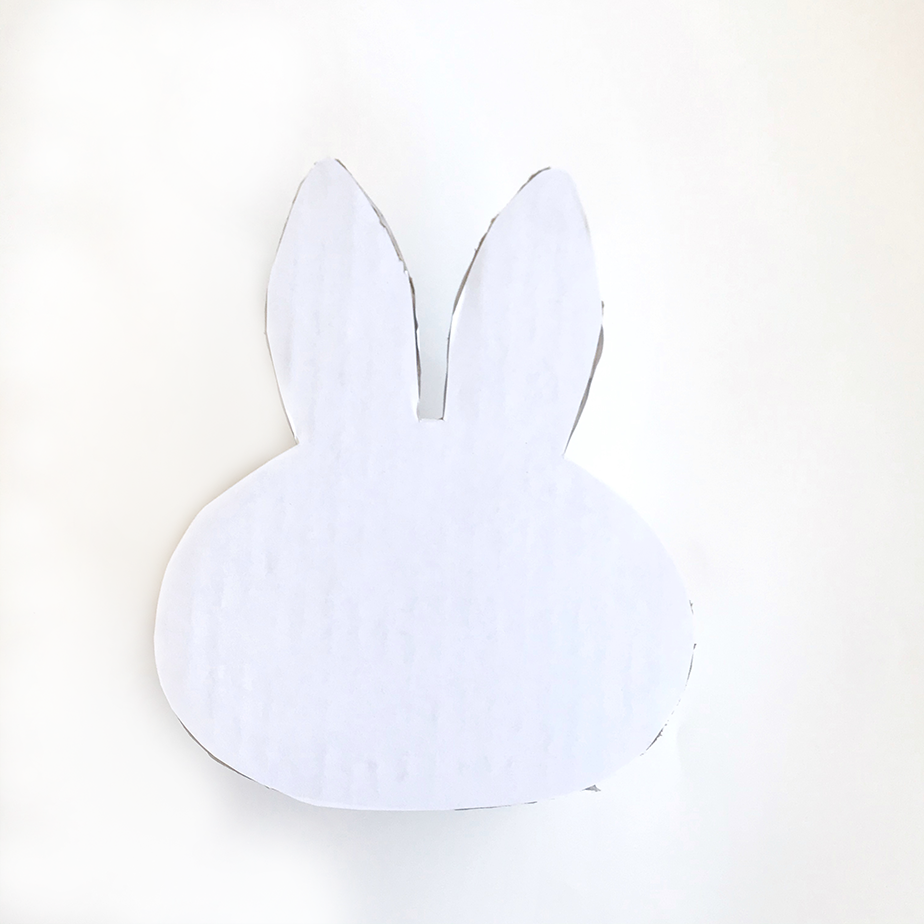
Print and cut the template pieces. Trace the front and back pieces of the bunny -page 1- onto the cardboard, making sure you mark the lines at the bottom of both pieces, then cut them out.
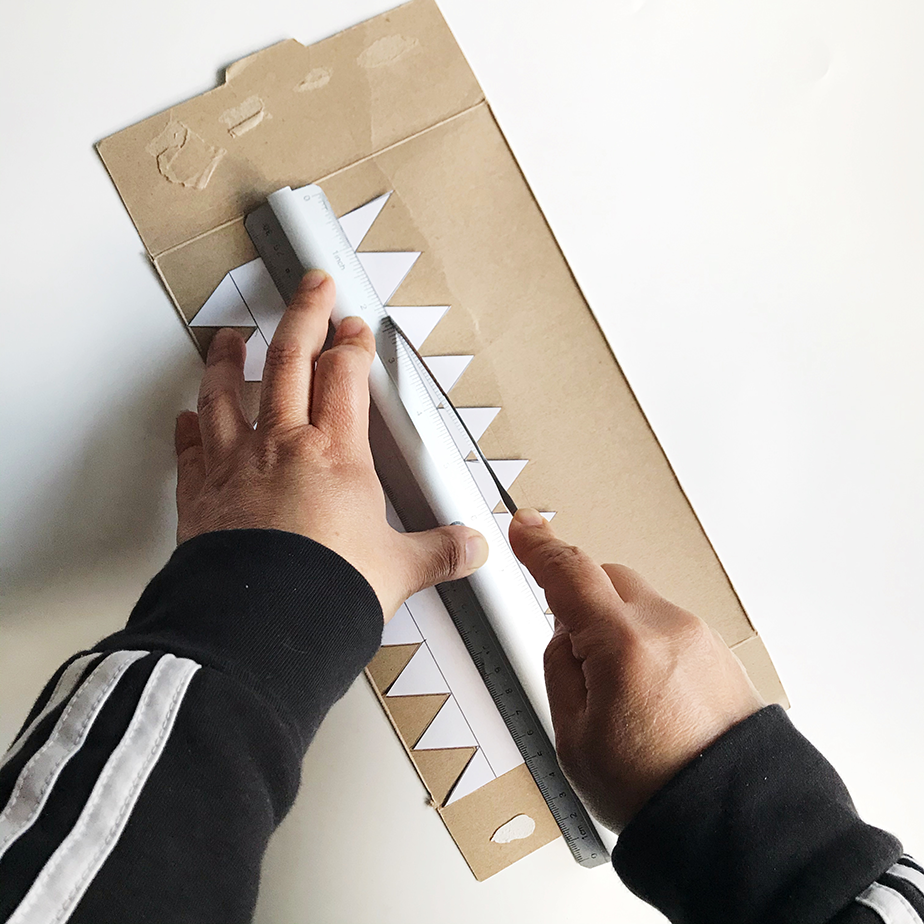
2
Mark the strips on page 2 onto the cardboard box and score the black straight lines, you can use the back of a butter knife, a very sharp pencil/pen or a utility knife pressing slightly so that your knife doesn’t go all the way and cuts it off. Once all marks are scored cut the stripes.
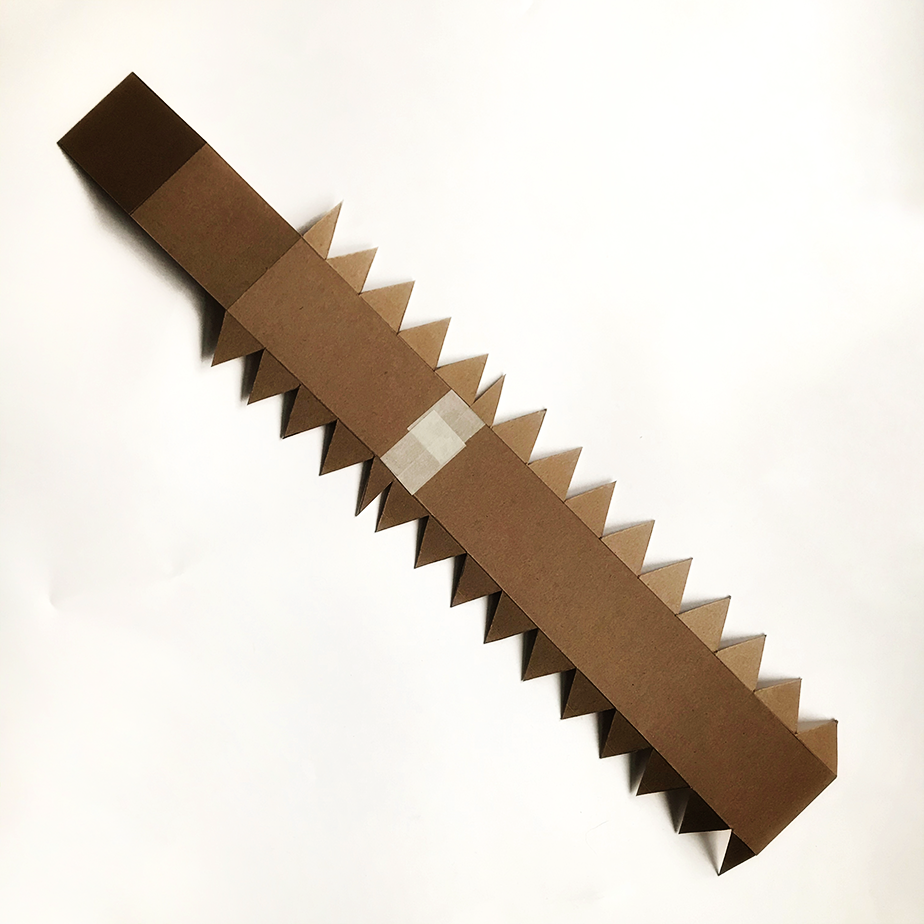
3
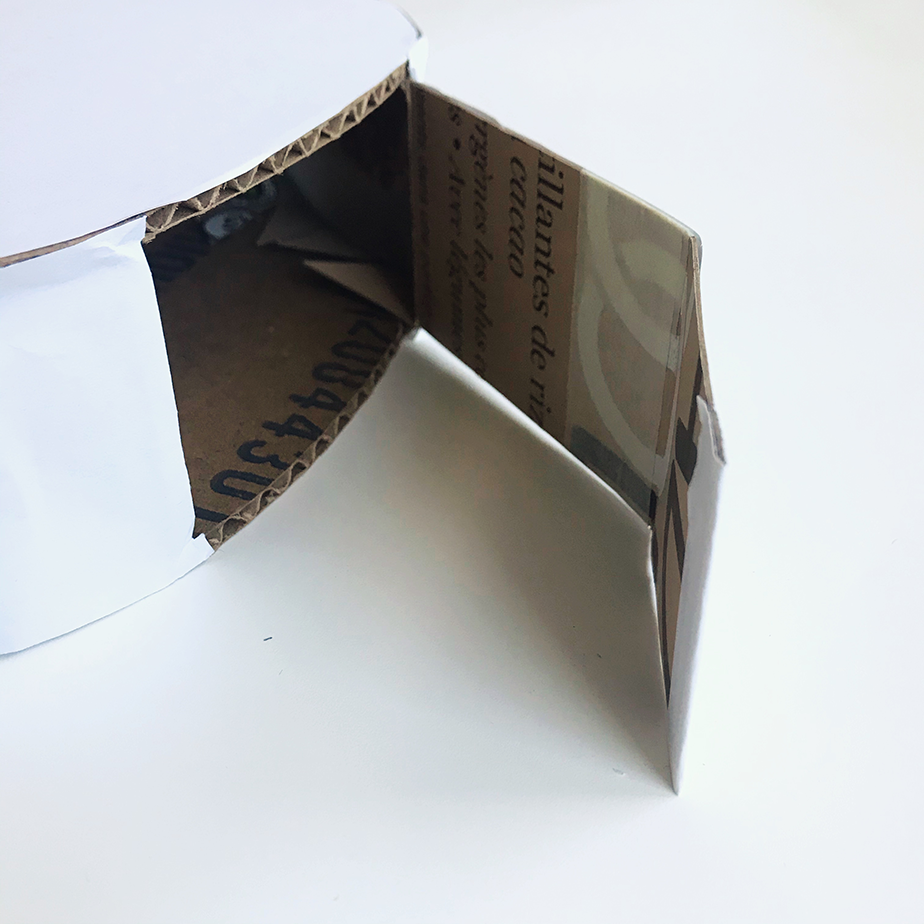
Fold all the triangular tabs downward and join the 2 stripes together (like shown in the picture) with a strip of masking tape, front and back.
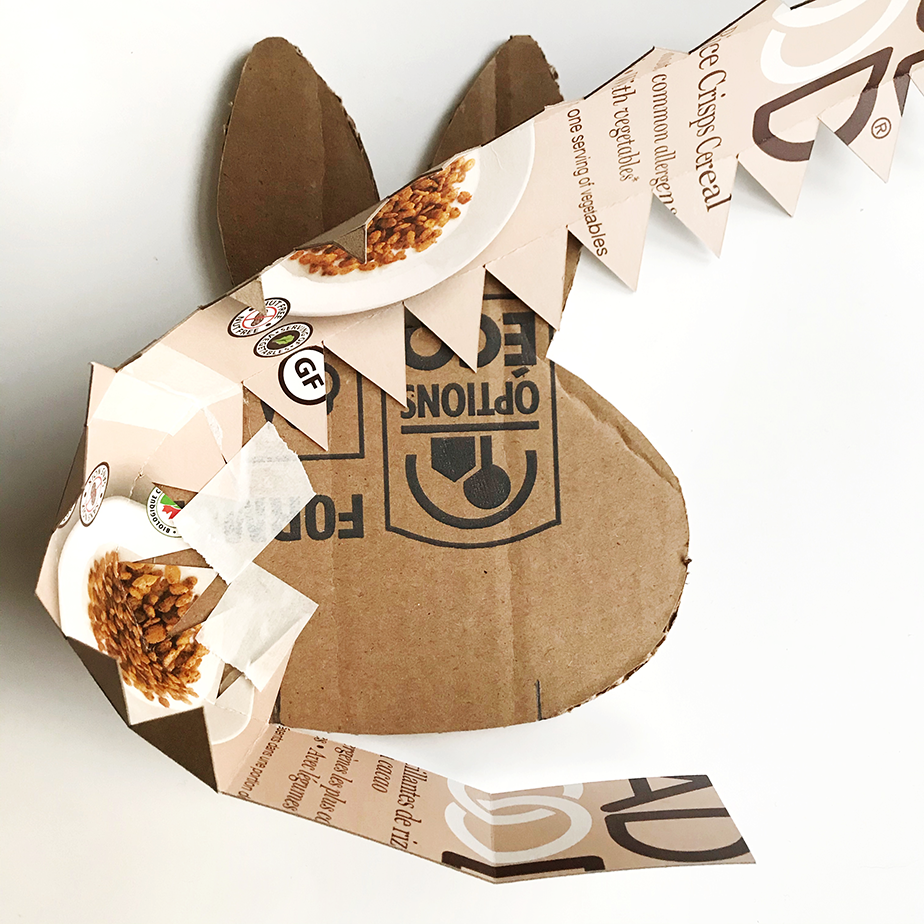
4
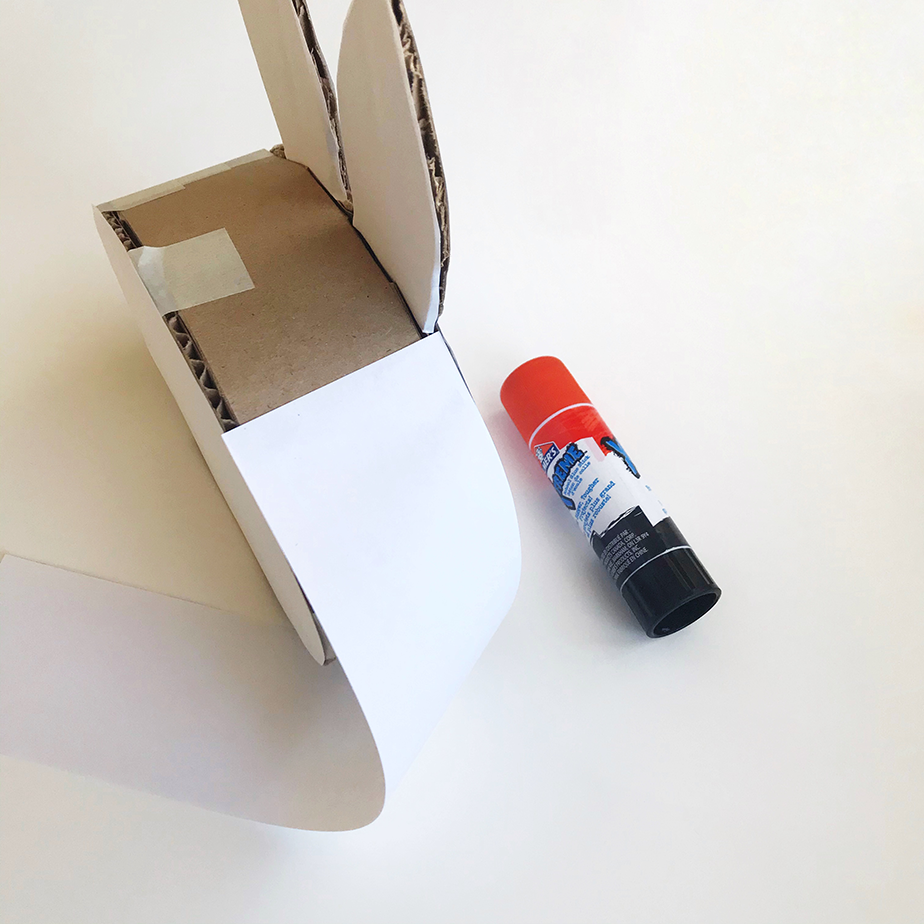
Start gluing your strip around the front side of the bunny starting at one the bottom marks. You can use a glue gun or a glue stick, when using a glue stick you can tape down the tabs in place as you glue them, so that it doesn’t wiggle out of place while you are moving the strip around.
If your cardboard has lettering or design on one side, make sure to glue your tabs onto that side so that it is hidden from the face of the piñata.
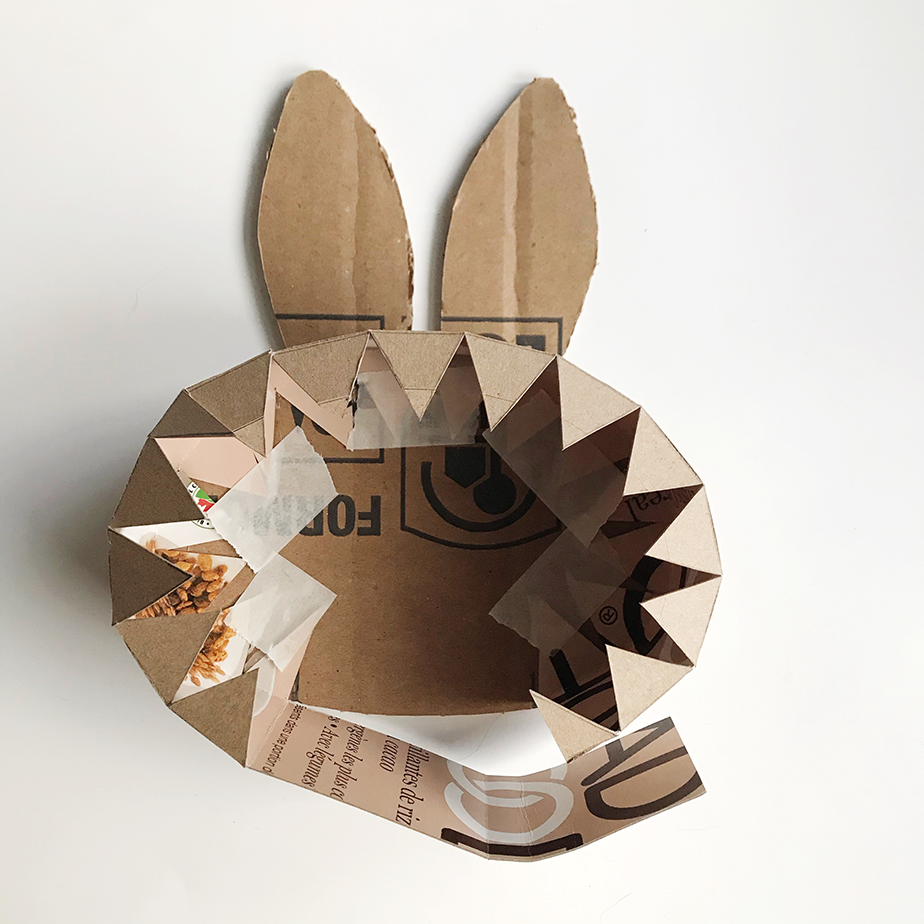
5
Once all the tabs are glued onto the front side, apply glue to the remaining tabs and place the back side of the bunny on top.
Remember to keep any design or lettering of the carboard facing down, so that it can be hidden from the face of the piñata.
If you glued the back piece with a gluestick, remember to add pieces of tape around it to keep it in place while the glue dries.
6
Close your piñata “door” and trace the front of your piñata twice on a piece of white paper (copy paper works best). Cut one piece full and the other into two pieces, face and ears, like shown in the picture.
This will give our piñata a white coat, so that when we apply our main paper, the cardboard won’t show through. If your paper is thick, you can skip to step 10.
7
Glue the full part to the front of the piñata and the other pieces to the back of the bunny’s head and ears.
8
Measure the width of your piñata (it will vary depending on the width of your cardboard) and cut a couple of strips of copy paper using that measurement.
Glue the strips to the side of the piñata starting by the end of one of the ears.
9
Trim the strip to fit as needed (it will need a bit of triming at the top behind the ears and on the “door” sides.
10
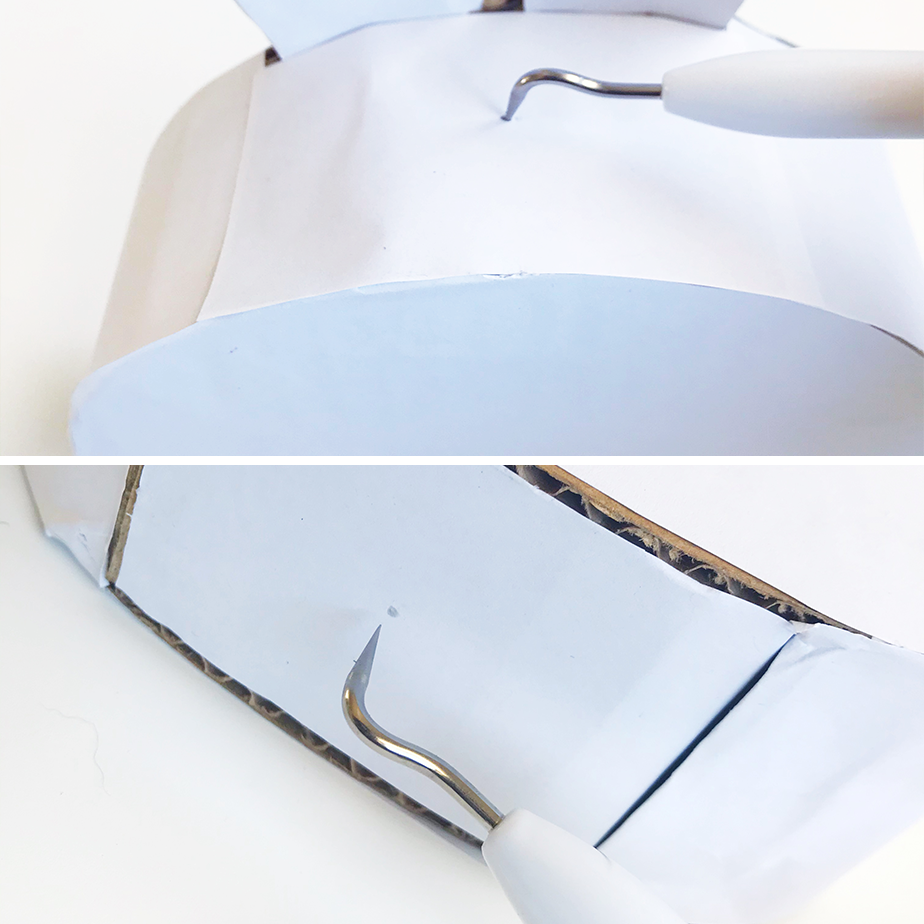
Use a ruler to find out the middle point at the top (behind the ears) and botton (door) and mark them with a pencil. Make a hole on the points you just marked, you can use a fat needle, your sicssors or the tip of a sharp knife (please make sure an adult helps with this step).
11
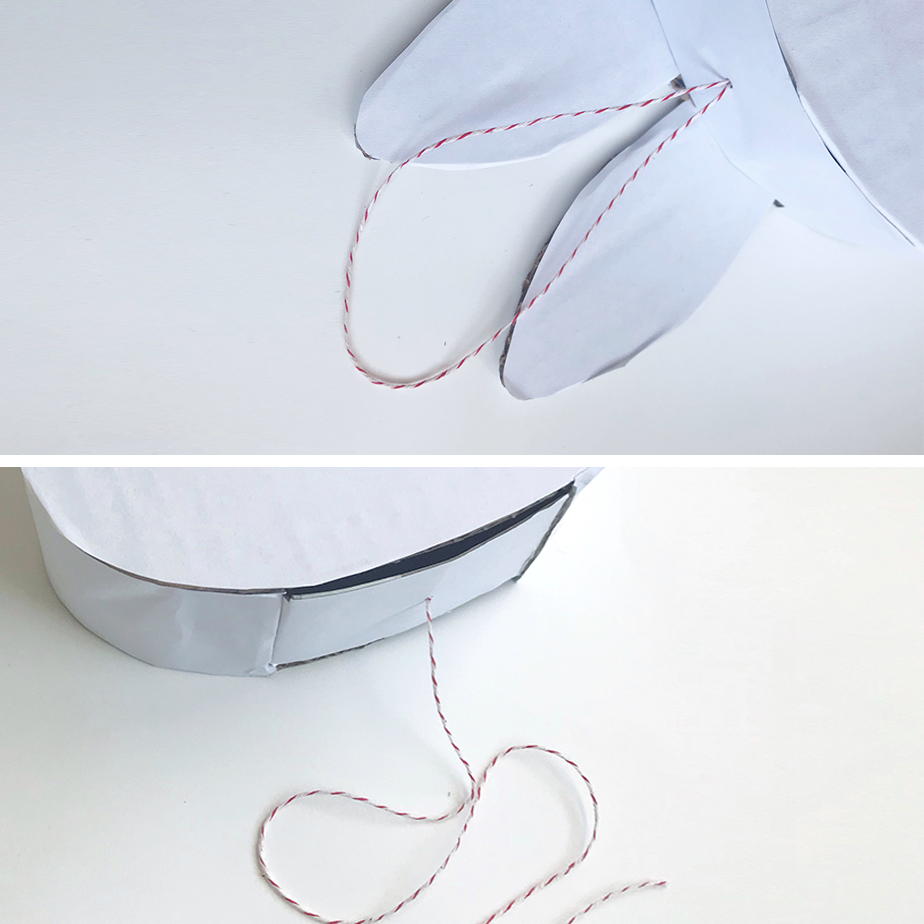
Take your string and cut a piece about 14 inches long, fold it in half and pass it through the top hole keeping the loop at the top. Make a knot at the bottom of the string and pull the top loop to make sure it stays in place and that it keeps your piñata balanced. If it is not balanced don’t worry, you can make a new more centered hole and try again, we’ll be placing paper of top of the white copy paper so it will cover the hole that didn’t work.
Once your string is in the right spot, tape the bottom (inside the piñata) with masking tape.
Cut a second piece of string about 9 inches long and pass it through the bottom hole making a knot on the side that will face the inside of the piñata.
12
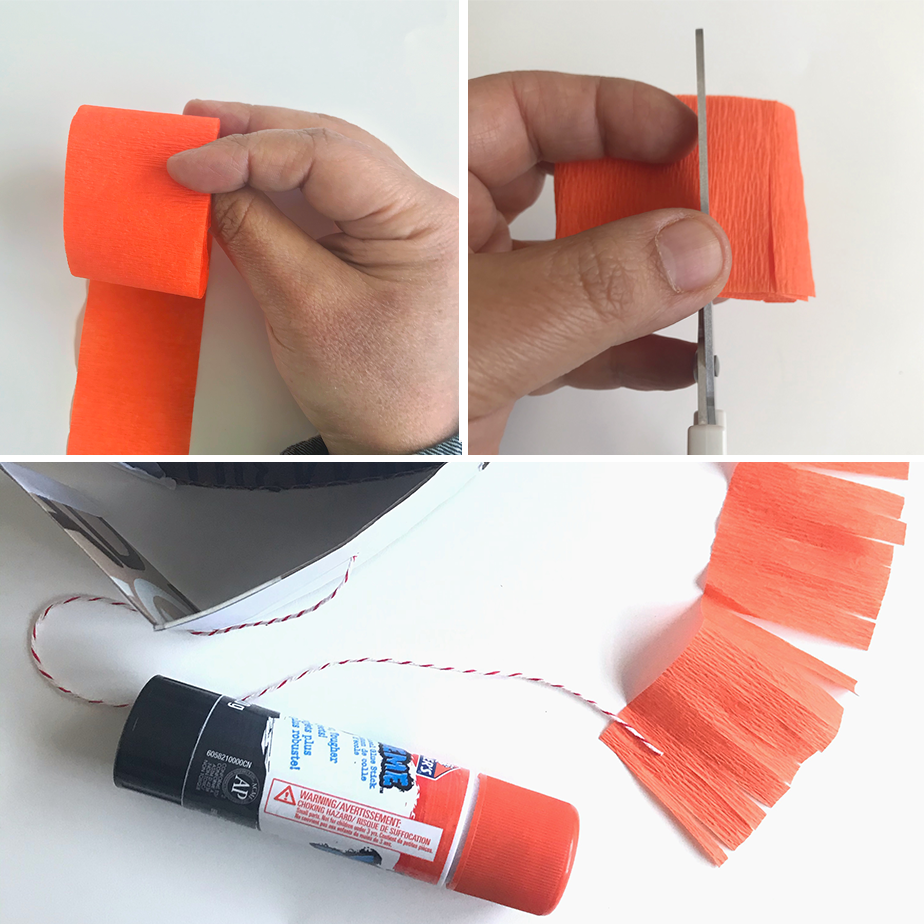
Now we are going to make a little paper tassle for the botton string. Take some paper (any colour you have, you can even colour some copy paper) and cut a strip about 2 inches wide and 11in tall (depending on the size of the paper).
Make a fold about 4 in long and keep folding it on itself 4 times. Holding it horizontally, make cuts about 1/2 inch wide stopping about 1/2 inch from the top. You’ll end up with a fringed piece. Open it and lay it out, now glue the end of the botton string to the top of your fringe. Fold the glued side and start making a roll, glueing in place every 2 or 3 folds. Once you reach the end, glue it in place and add a piece of clear or colour tape on top to keep it together. I used green tape but you can colour some masking tape or use clear tape too.
13
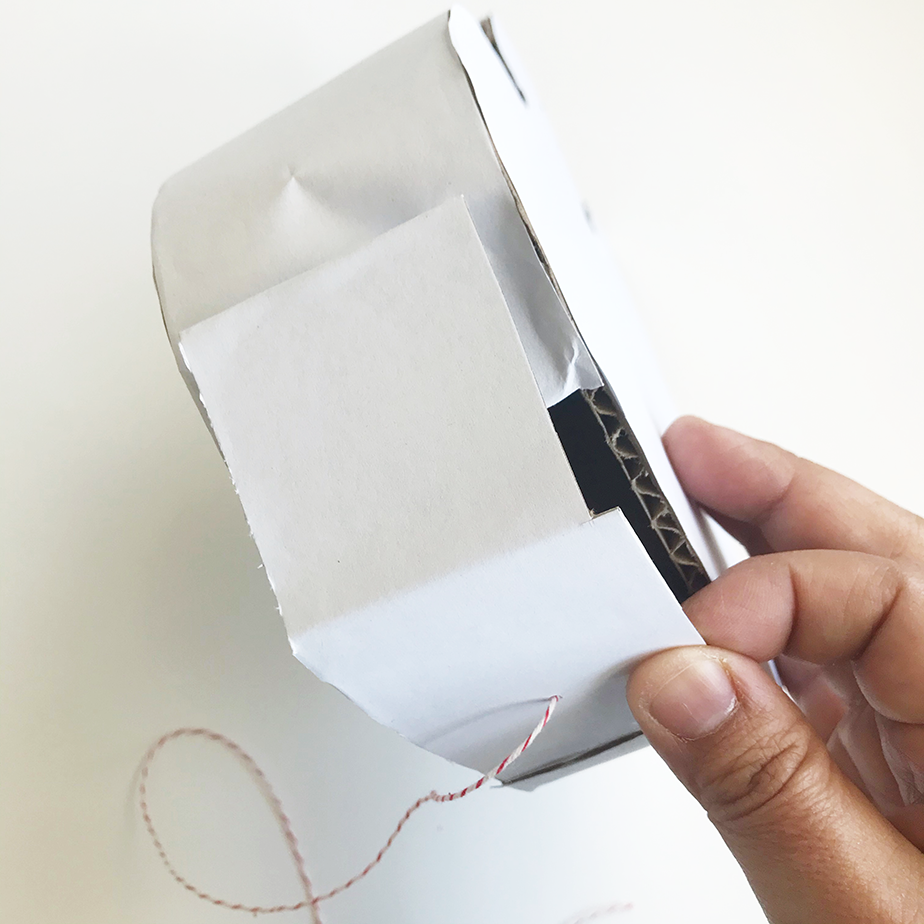
Close the door of your piñata and test the bottom string by pulling on it. If your door is a bit stuck or doesn’t open quickly, just cut a small piece at one of the ends, like shown in the picture.
14
At this point, you could be done, just cut the eyes and mouth from the template and place on the bunny, you can also trace the face on a piece of black paper, cut it out and use that instead of the copy paper.
At this stage you can decorate your bunny with colour pencils, paper cut outs or anything you want.
If you want to give your piñata it a more classic look, don’t glue your face yet and follow the next steps.
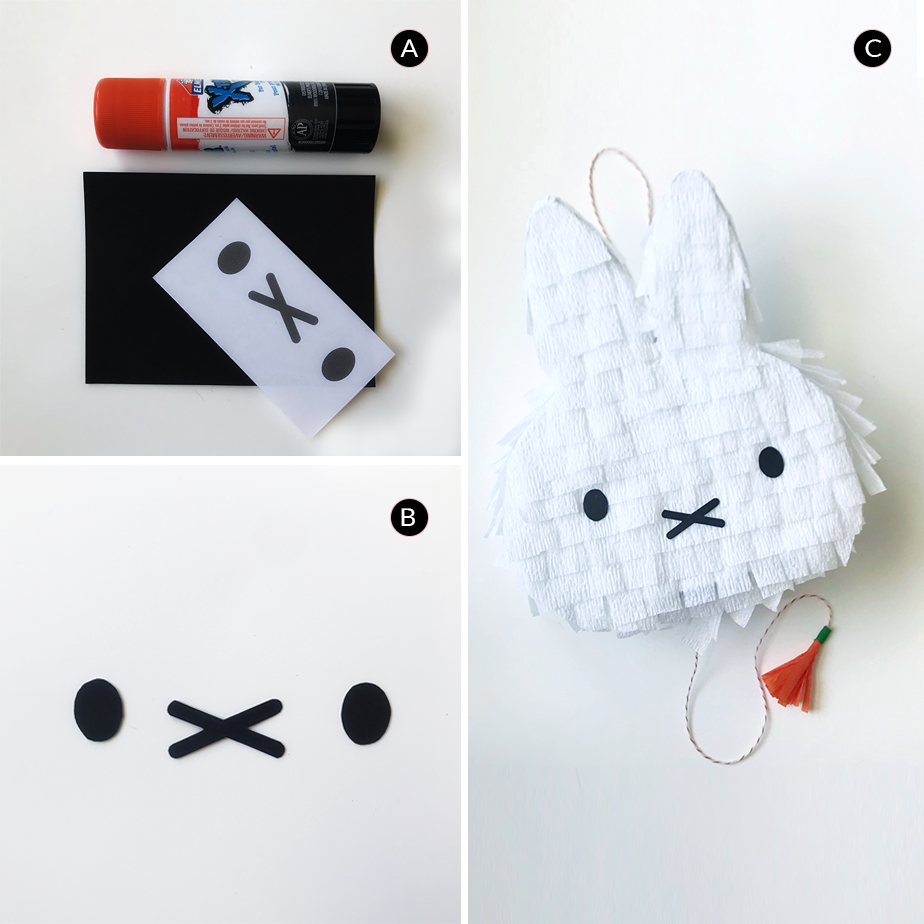
15
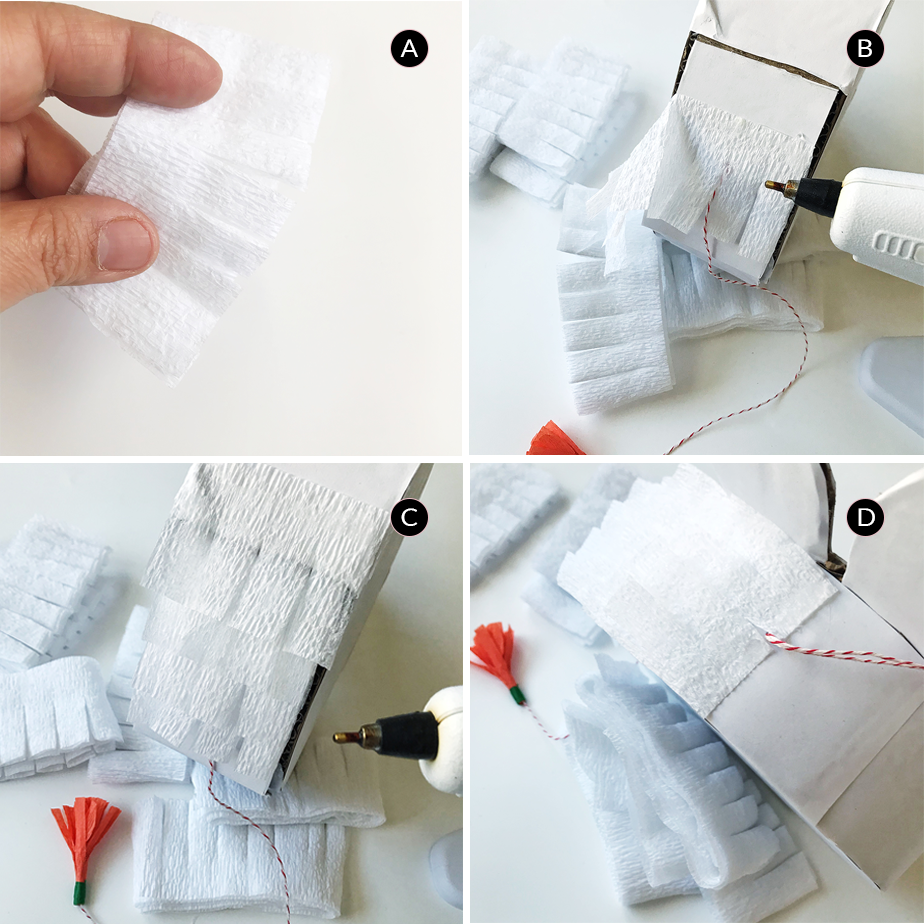
A . Cut strips of your white (or main colour ) paper about 2 inches wide. Fold and cut like we did with the tassle paper but this time make the fringe pieces 1 in wide.
B . Glue your fringe strips onto the sides of the piñata, starting from the bottom, using the string as the starting point. The open part of the fringe will face the string (like shown in picture B). Make sure you place the glue (stick or silicone) onto the piñata rather than the paper itself, this will help keep the layers more even and the paper cleaner.
C. Once you glued the first layer, cut your strip and glue a second layer on top.
D. Continue glueing layers until you get to the top string.
16
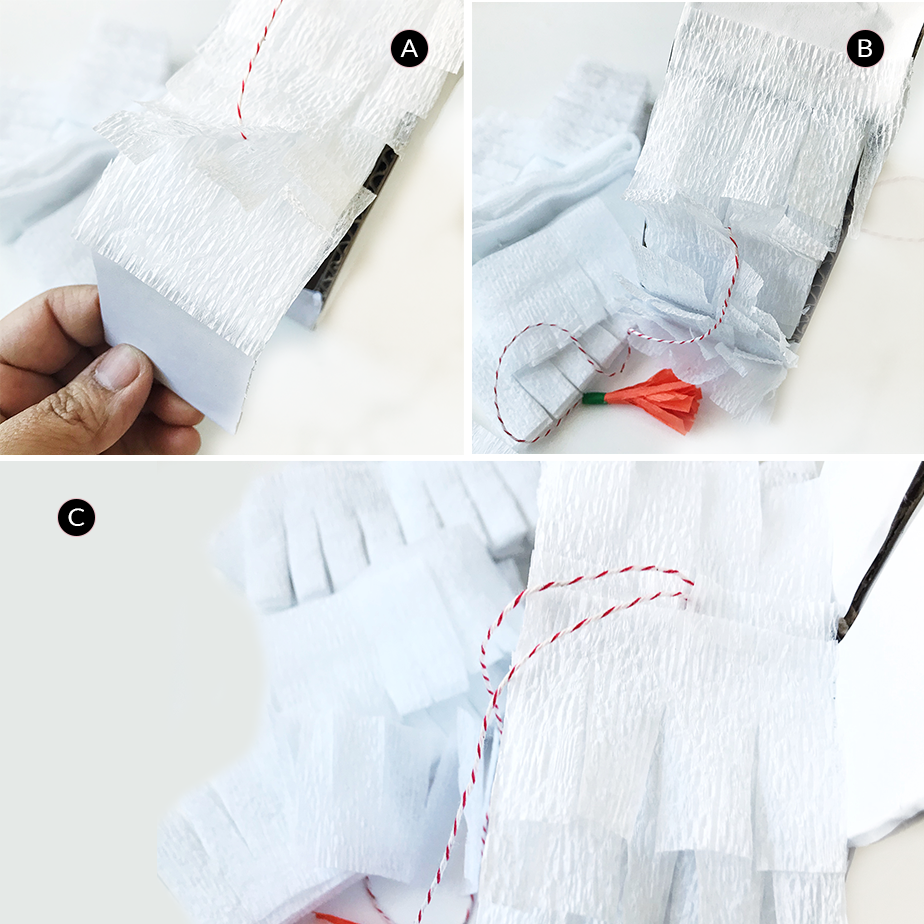
A . Go back to the bottom of the piñata and start glueing a strip from the other end of the string, leaving the open (cut) side of the fringe facing the string.
B . Cut and glue your layers going towards the top.
C. The last layer will end at to the upper string.
17
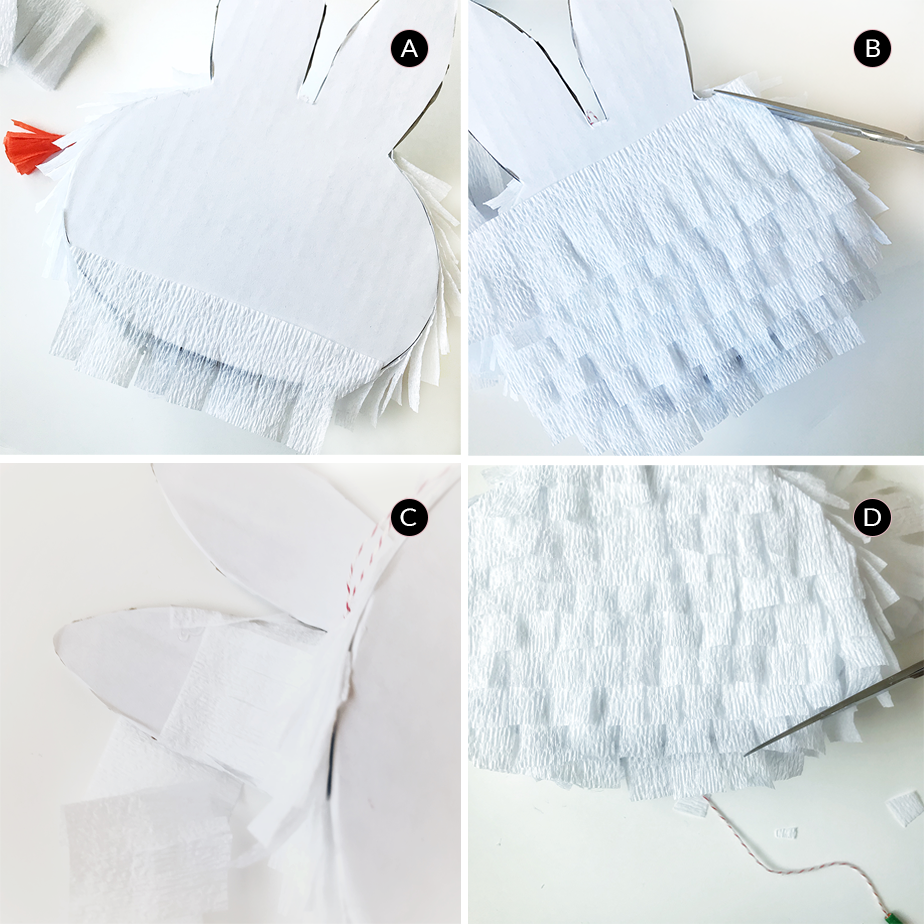
A . Now let’s do the same layering on the front of the bunny, starting at the bottom and going towards the ears.
B . Trim the ends as you go to keep the shape of the face.
C. When you get to the ears, take your strip all the way around each ear. Cut the end of each wrap around and add the next layer in top.
D. Layer the back of the bunny’s head and once it is all covered, give it a last trim and make it look just right. If you see any empty spots you can cut some single pieces of the fringe and add them under the top layer.
18
A . Time to add the face, you can cut and use the one you printed with your template or trace it on a black piece of paper and cut it out
B . They should look like in picture B.
C. Lastly, place and glue the face of your bunny. You are done!!!!
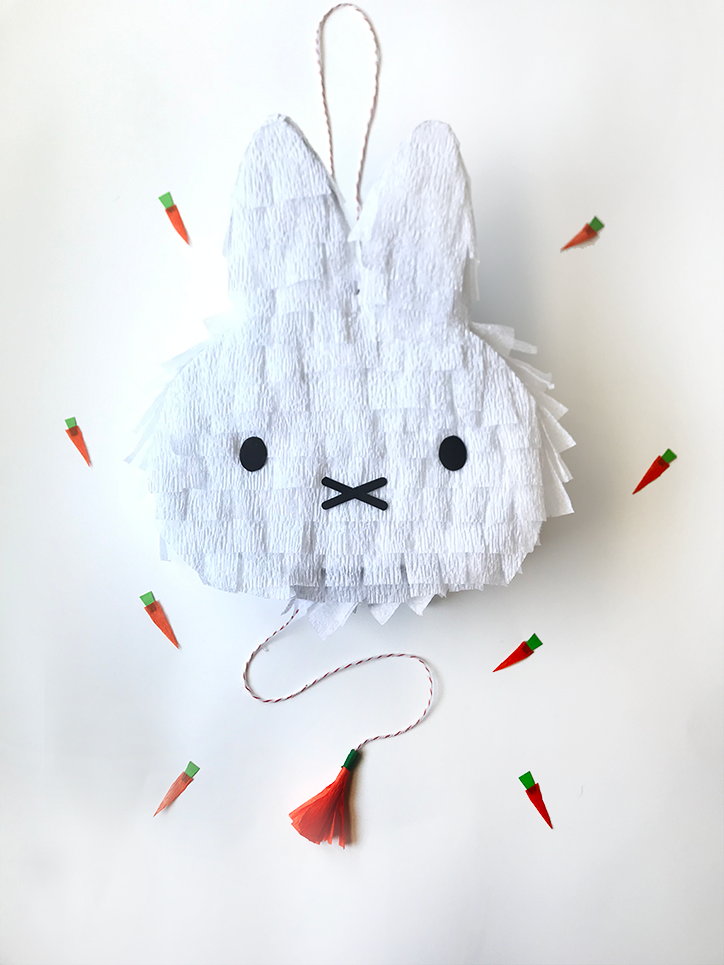
NOW FILL IT UP WITH YOUR FAVOURITE TREATS AND SOME HOME MADE CONFETTI.
I hope you enjoyed this tutorial, I would love to see all your bunny piñatas. Please share on social media and tag me @papuul.paper. If you have any questions feel free to send me a DM on my instagram account @papuul.paper .
HAPPY EASTER!